Learn how to make delicious homemade white bread without a bread machine! With a bit of patience, you can have fluffy, freshly baked white bread at home.
- A Simple Recipe for Homemade White Bread!
- How to Make Homemade White Bread
- Homemade White Bread Tips and Tricks
- FAQ How long should I knead bread dough?
- FAQ How do I know if my yeast is active?
- FAQ Is it cheaper to make your own bread?
- Easy Homemade White Bread Recipe Card and Video Tutorial
- Homemade White Bread
A Simple Recipe for Homemade White Bread!
When I was a kid, I grew up in the Central District of Seattle—we called it the CD. We lived within walking distance of a few bakeries, one of which was the famous Wonder Bread bakery. I remember waking up to the smell of fresh bread every morning. Sometimes my mother would walk us to the bakeries to get fresh loaves of bread and cookies. I was such an odd child that I was more excited about getting the bread than the cookies!
There’s just something about fresh homemade white bread. It’s fluffy and soft—when you bite into it, it almost melts in your mouth like cotton candy. If you haven’t guessed already, I’m going to show you how to make homemade white bread in this post. If y’all remember, people were baking so much homemade bread at the start of the pandemic that there was a freakin’ flour shortage! Since then, we’ve all calmed down, and flour is back on the shelves. So, I think it’s time I share a homemade white bread recipe.
I adapted this recipe from Julia Child’s White Bread recipe, and EVERYONE loves it—my friends, family, and of course… ME! I’ve had requests to make this bread from just about everyone. Leave the store-bought stuff on the shelves; this fluffy homemade white bread goes with EVERYTHING. You can serve it with dinner, make a PB&J for the kids, and make yourself a good old-fashioned hot link sandwich. Use this bread for anything!
Speaking of store-bought bread… you’re probably asking, “Rosie, why the heck would I make a loaf of bread when I could simply buy it from the store?!” I’ll tell you why—IT’S NOT THE SAME. Store-bought bread does NOT compare to homemade bread. Store-bought has a bunch of ingredients I can’t even pronounce. And the price! Store-bought bread can range anywhere from 99 cents to more than $6 at my local grocery store, and small business bakery bread costs even more.
Cheap store-bought bread is usually old and dry—perfect for a bread pudding or stuffing recipe, but not the ideal sandwich bread. If I have a choice to spend $6 on a good store-bought loaf (still packed with preservatives to make it last longer) OR take that money and make my own amazing homemade loaves of bread… y’all know I’m going with the second option! So let’s jump to what you need to make delicious homemade white bread.
How to Make Homemade White Bread
Ingredients
This recipe calls for only a handful of ingredients, and you likely have almost all of them on hand. Here’s what you need:
- All-purpose flour: I use all-purpose flour, or AP flour, for my recipe, but it would be fine to sub out bread flour instead. Bread flour has more protein, so don’t overwork the bread dough, or you’ll have dense, tough bread.
- Active dry yeast: Yeast is a staple ingredient in bread making—you can’t get the doughy rise without it, so make sure you have a few packets of this stuff on hand!
- Warm water: Warm water helps activate the yeast. Some bread recipes call for water at a specific temperature. If you can, use a thermometer to get the water to about 110-115 degrees, or run your kitchen tap until the water is warm but not hot.
- Sugar and salt: Sugar works with the yeast to speed up the activity (and gives the white bread that ever-so-slight sweetness). Adding salt later on in the mixing process helps balance out the sweetness.
- Melted butter: Butter gives homemade white bread a yummy richness that I think is essential, so don’t skip out on it!
Homemade White Bread Tips and Tricks
Active Dry Yeast vs. Instant Yeast: Which should I use for homemade bread?
What’s the difference between active dry yeast and instant yeast? They’re pretty similar. Instant yeast works a bit quicker than active dry yeast. Use instant yeast if you’re a little less patient or in a hurry. It will make the bread rise faster, meaning less wait time when proofing.
What equipment do you need to make homemade white bread?
The good news is you can make this easy homemade white bread recipe without a bread machine! If you have a bread machine and have made delicious homemade bread with it, great! However, you don’t need one for this recipe. Here’s what you do need:
- Stand mixer with a dough hook attachment—highly recommended! You definitely can make this white bread recipe without a stand mixer, but it’s a lot of upper-body work!
- Mixing bowl for proofing: Proofing the bread is a critical step, so you’ll need a large mixing bowl with room for the bread to rise.
- Loaf pan: There are plenty of loaf pans to choose from. The best loaf pan will last through many other recipes, so choose wisely! (Put your loaf pans to use with my pepperoni pizza pull-apart, a classic meatloaf, an easy banana bread, or a yummy lemon loaf for dessert).
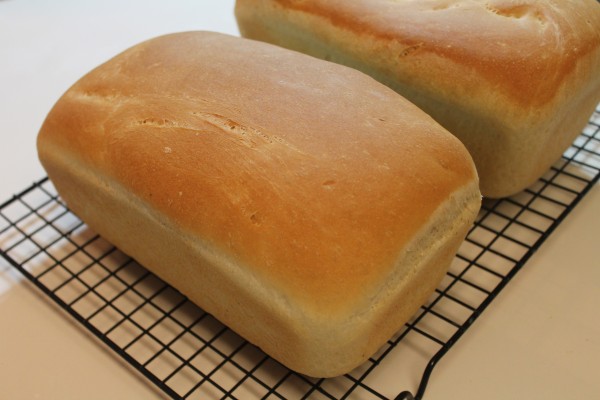
- Cooling rack: It may not seem important, but it is! A wire cooling rack allows for even cooling of the bread so that you won’t have no soggy-bottomed bread.
Instructions
Now, I’m not going to lie to you. Making homemade bread takes time. You need to mix the dough, knead, let it rise, knead some more, and bake. If you’re not a patient person, this may not be the recipe for you. However, if you plan on trying this recipe, I highly suggest doing it on a day when you have plenty of time to spare. I personally like to make my bread on the weekends.
Step 1: Activate the yeast.
Now, yes, we are using active dry yeast, so it is technically already active. However, the first step is starting the bubbly reaction of the yeast. To do this, mix the yeast, warm water, and sugar into your stand mixer mixing bowl and let it sit for about 7-10 minutes until it’s nice and foamy. Don’t touch it—let it do its thing! You should be able to smell that pleasant yeasty smell when it’s ready.
Step 2: Add the rest of the bread dough ingredients.
Next, add more warm water and melted butter to the active yeast. Attach the dough hook and add the all-purpose flour into the stand mixer bowl one cup at a time, then start mixing. The dough will take a few minutes to come together. Don’t overload your mixer by adding all the flour at once. Your stand mixer should be on medium speed until all the flour and salt is mixed. Then, turn the mixer down to low and allow it to work its magic. It’ll take about 6 minutes for the dough to come together fully.
Step 3: Knead the dough (the first time).
Now it’s time to start kneading! Remove the bread dough from the bowl and mix on the lightly floured surface for about 8 minutes. Kneading means just using your hands to pull and fold the bread dough over on itself to build the gluten in the dough. This is the first of two times you’ll need to knead this white bread dough.
Step 4: First dough proof.
For the first proof, you’ll need a well-greased large bowl—use butter or light oil to grease the bowl. Plop the dough in there, cover it with a moist kitchen towel or plastic wrap, and let it proof for about one and a half hours. Proofing is a delicate and vital process in breadmaking. The dough needs to rise at room temperature—about 75 to 80 degrees. Resist the urge to peek and poke at the dough!! Let that bowl sit, and DO NOT TOUCH until the time’s up.
Step 5: Time to knead and proof the dough again.
At this point, your bread dough should be about double in size. You have to release all the carbon dioxide in the dough, so give it a strong punch right in the center. Yes—I’m serious! Great way to get out some frustration! Then you’re going to knead the dough for about five minutes.
This homemade white bread recipe makes two loaves of bread, so at this point, you need to cut the bread dough ball in half. Place each half into a greased loaf pan, cover, and let proof again until doubled in size.
Step 6: You’re ready to bake your homemade white bread!
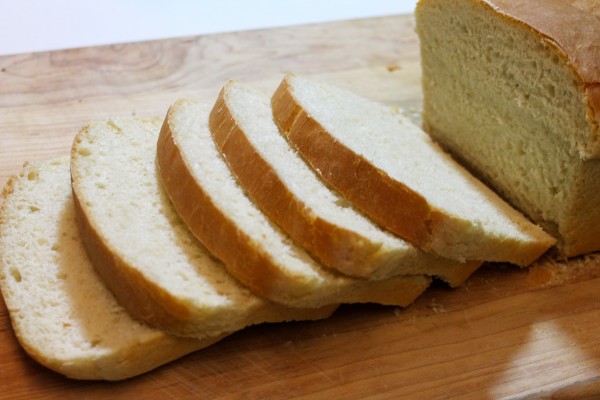
Once the loaves of bread dough are again double in size, you’re finally ready to bake! Pop them into a preheated oven at 375 degrees for 25-30 minutes. Your homemade white bread will be a nice, gorgeous golden brown on top with a crispy crust. Immediately after taking the bread out of the oven, remove it from the loaf pans and allow it to cool completely on a wire rack. This will enable a perfectly crispy crust to form all around the bread so that you won’t have any soggy bottoms.
Now, remember that this bread is all-natural and contains no preservatives, so it will not last as long as store-bought bread. My bread is always gone in a few days, but I know this bread lasts up to a week. You could also freeze it! Store your homemade white bread wrapped in plastic, sealed tight.
FAQ: How long should I knead bread dough?
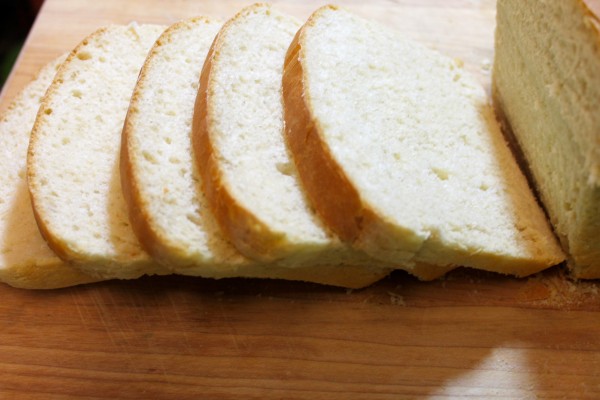
Kneading bread dough helps build the gluten, which gives bread its light and airy texture—so it’s an essential process. Under-kneaded bread will not puff up in the oven, resulting in a flat, dense loaf. Over-kneaded bread tends to have an extra crispy crust and is dry in the middle. Both results aren’t good! Because we’re using a stand mixer in this recipe, you shouldn’t have to hand-knead the dough for more than 6-8 minutes. The dough is fully kneaded and ready to proof or bake when it’s smooth and holds its shape or when you’re just flat-out tired!
FAQ: How do I know if my yeast is active?
These days, pre-packaged yeast can last for quite a long time—around two years—so chances are, your yeast is active and ready to use. Mix a packet of yeast with sugar and warm water to test if your yeast is active. If, after 10 minutes, the dough is foaming and smells yeasty, it’s active and good to use.
FAQ: Is it cheaper to make your own bread?
With the rising cost of groceries these days, YES—it’s definitely cheaper to make your own bread! Now, I know it isn’t always realistic to make your own homemade white bread. Believe me, as a busy mom and businesswoman, I know I ain’t got the time! Like I said before, I’d rather spend $6 making multiple loaves of bread than $6 on one kinda-okay store-bought loaf. I think baking homemade bread is a relaxing activity that’s great for chill weekends. The cost-breakdown of buying vs. baking bread favors homemade if you’re buying cheaper on-sale ingredients. If you have the time and patience, why not treat yourself?
Easy Homemade White Bread Recipe Card and Video Tutorial
Are y’all ready to see how I make my homemade white bread recipe? I have a step-by-step video tutorial on my YouTube channel that shows you exactly how I make it. I’ve also included the exact measurements and directions below in the recipe card. If you try out this white bread recipe, let me know how it turned out in the comments! Don’t forget to subscribe to I Heart Recipes on YouTube to see all of my recipe videos, cooking tips, and more! You can also follow me on Facebook, Instagram, and Pinterest to keep up with all things Rosie and I Heart Recipes.

Homemade White Bread
Ingredients
- 6 – 6 1/2 cups all purpose flour
- 1 tbsp active dry yeast
- 1 tbsp sugar
- 2 2/3 cup warm water
- 2 tsp salt
- 1/4 cup unsalted butter melted
Instructions
- Pour 1/2 cup of warm water into your stand mixer (or large mixing bowl). Sprinkle in active dry yeast and sugar, then stir until well combined. Let sit for about 7-10 minutes until the mixture is nice and foamy.
- Pour the rest of the warm water and melted butter into the stand mixer bowl.
- Attach the dough hook attachment and turn the stand mixer on to LOW. Start slowly adding the flour, one cup at a time.
- Once you've added about 1/3rd of the flour, sprinkle in the salt. Turn the mixer speed up to MEDIUM (about 6-7). Continue adding the rest of the flour.
- Turn the stand mixer speed back down to LOW (around 4) and let the dough mix for about 6 minutes.
- Remove the dough from the bowl. On a lightly floured surface, knead the dough for about 8 minutes.
- Lightly oil a bowl, place the dough into the bowl, and cover. Place the bowl in a warm place and let the dough sit (proof) for about 1.5 hours. The dough should double in size.
- Once the dough has proofed to double the size, punch the dough in the middle and remove it from the bowl.
- Knead the dough for about 5 minutes, then cut the dough in half.
- Lightly oil two loaf pans, then place the dough in the pans.
- Cover both of the loaf pans (with a towel or plastic wrap) and store them in a warm place until the dough doubles in size again.
- Bake the loaves at 375 F for 25-30 minutes.
- Once the loaves are removed from the oven, immediately remove them from the pans and place them on a cooling rack.
- Let the bread cool down, then serve.




You are pretty good! Thanks for your tips!
Thanks for coming by. I appreciate it!
Just made my Homemade White Bread….PERFECT! Followed the recipe and it turned out just the way Rosie said it would 🙂 Love it! Will be adding it to Rosie’s Meatloaf recipe I am making tonight. Love this site and her videos…can you tell LOL.
Aweeee. Thanks Cassie. Just got the email.. I’ll put the pic up tonight our in the morning! XOXO
I made this bread for a cooking class assignment and it was absolutely delicious! Thanks for the great recipe!
Thanks for using my recipe Maggie! XOXO
Can you sub whole wheat flour?
Hi Melanie! Sure!